Use strapi and Next.js to create Registration and Login Forms

After playing around a bit with Fronitity (and Wordpress as headless CMS) in the last few weeks or months, now I wanted to try out different Frameworks. There's a lot of them, surely, so after seeing some pople on Twitter suggesting Strapi and Next.js, I decided to give them a shot.
Intro
Both of them looked pretty nice on the beginning. I was impressed how easy it is to get started with Next,js and how easy it was to create Custom Types in Strapi.
But first I wanted to write a bit about the two components I was going to use in this new project, before later on describe how I manged to have a Site with User Registration / Login site in Next.js
Next.js
Why Next.js?
Meanwhile there's tons of frameworks to build production ready applications within a few hours. Nuxt.js, Angular, Vue, NextJS, Gatsby, Eleventy, Frontity to just name a few of them. Personally, I think it's really difficult to actually choose one - especially when you aren't developing JS on a regular basis.
As mentioned in a earlier blog, I really like to deploy my projects on Vercel, as I love how easy it to make them available to others within a few minutes. From Vercel CLI, Deploy Hooks and Git-Integrations there's a lot of options on how to achieve that
So Next.js is the React Framework by vercel - I thought why just go for the one which is actually being developed by the company I am hosting the projects on. Can't be a bad decision, right?
Personally, I prefer the Git-Integration which has some great features: Preview Deployments for all your branches, easy Redeployments and the option to "Promote to Production". So basically you can preview your app, ask the customer to preview the the latest changes you made before pushing them to production.
If something still went wrong, you don't need to worry because within a few minutes you can Promote an old version (one where you know it's still working, without needing to fix the Issue ASAP).
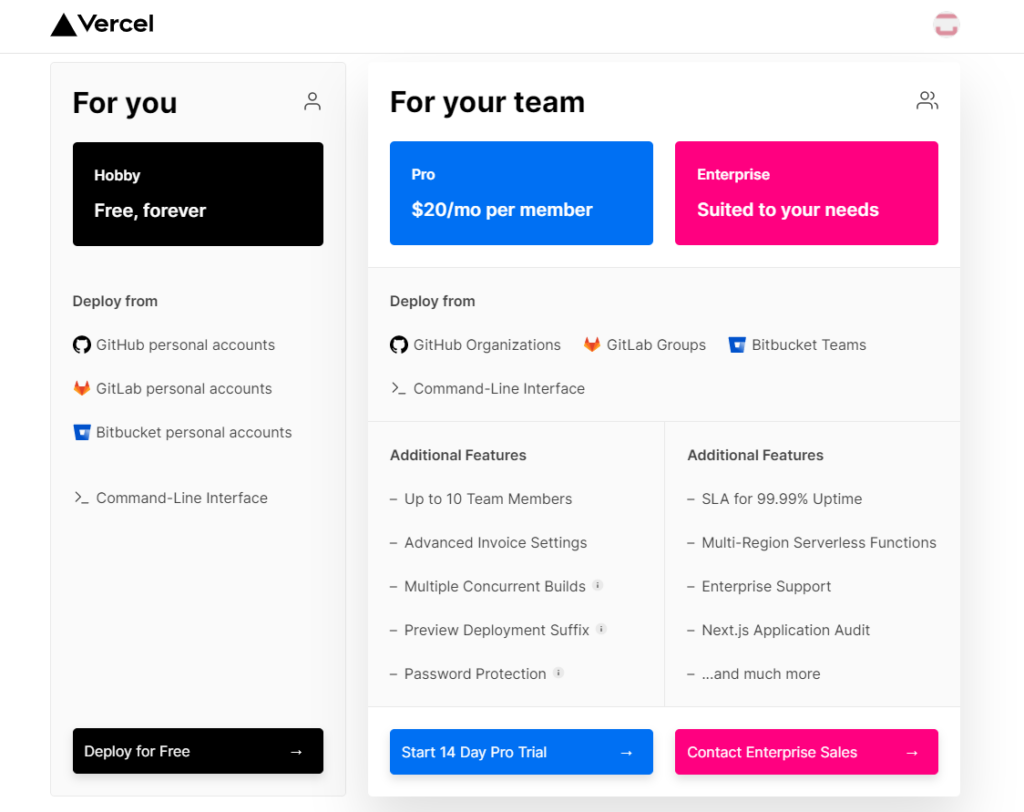
Another great feature of having deployment over at Vercel is, that you can manage your domains directly there. From directly buying them via the GUI at vercel.com or adding CNAME or A-Records to your own hosting
Later on, you can easily add an (sub-)domain to specific git branch. Want to have a custom URL for your development branch. Nothing easier than that and if your hosting provider is good at updating DNS Records, it's done if a few minutes. Obviously, vercel also automatically generates some SSL Certificates using Let's Encrypt, but you can also upload your own certificates
And the best part of it? If you deploy from your personal Github/Gitlab and Bitbucked Accounts it's completely free:
Strapi
Similar like with the Frontends there's a ton of headless CMS available to choose from: Contentful, Strapi, GraphCMS, Ghost, Netlify CMS.
The first thing that impressed me, was how flexible Strapi and how fast you could get a basic API up and running.
Instead of needing to "develop" all the content of an CMS - Strapi uses an Content-Type Builder, where you can define what types of content you want to have on your Blog or API.
So, for example if you want to display a list of restaurants you can decide by yourself, what attributes a Restaurant would need to have (and you wouldn't start to look which fields could be used to store your information, like in an less-flexible approach), like an image, an address, a description
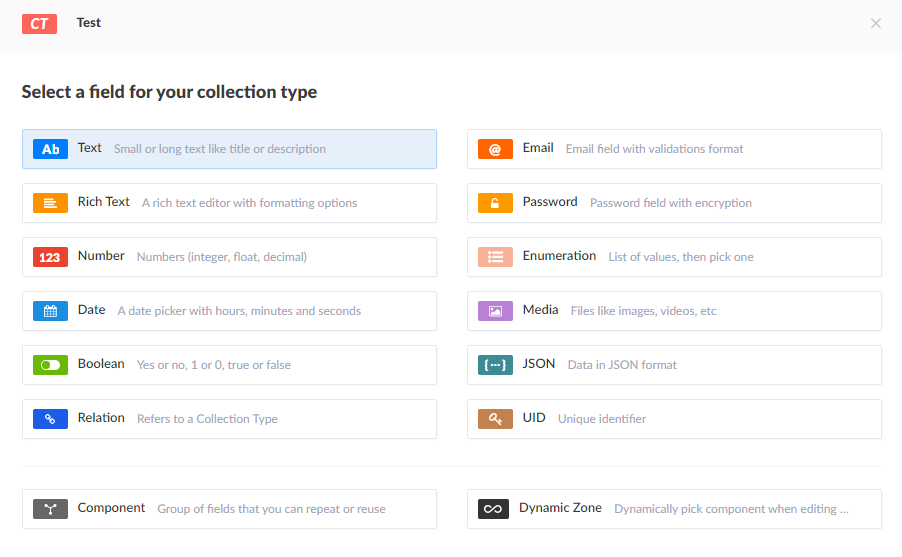
In Wordpress this is also possible using Custom Post Types, but I was impressed how easy, with a few clicks and zero lines of code you could add your Content-Types (you can event link them, like adding Dishes to restaurants).
Save the Content-Type and and after a reboot of the Strapi and you already have the /restaurants API available for query. Also, with a few clicks more you could add the GraphQL-Plugin which is available in the Marketplace. So in about max ten minutes you'd have setup a GraphQL-API.
One of downside of using Strapi for a blog is the deployment in my point of view, because you'd need to have a virtuall machine hosting and as well as a database (MongoDB, postgreSQL or MySQL). Which isn't that easy to find for free. Options are Heroku, Google App Engine, Digital Ocean, Azure and Amazon AWS.
For my first sample project, I have used Heroku, which offers you a freetier that allows you to deploy the Strapi project with an PostgreSQL database.
Another Issue is that when you are a hosting without permanent datastore, you need to handle the problem of storing images online. Options for that is an AWS S3 store or Cloudinary, like I did (Here is a great guide on how to do that)
The development
But after a LOT of words about those parts, it's time to get started with the development, starting with backend:
Backend
Getting started with Strapi is quite easy - just type the following in your terminal:
yarn create strapi-app my-project --quickstartIf you want to just play around locally, I would suggest picking an SQLite Database otherwise just select the same provider you can use on your hosting.
Next you, you'll need to create an Administrator user and then you'd already prepared to get started to achieve authentication in the backend 😎
Strapi, by default, offers an API-Endpoint for registering users (/auth/local/register), which excepts an username, email and a password. More about that here.
Bonus: If you want to have Users to confirm their email-Address, with a one click in the Backend: Settings -> Advanced Settings -> Enable Email Confirmation
Similar goes for the Login. Strapi comes with an login API-Endpoint (/auth/local), which accepts an identifier and a password (the identifier can be the username or password.
Besides using local users, Strapi also supports a lot of different authentication providers, like Twitter, Facebook, Github or LinkedIn.
Frontend
Getting started with Next.js is quite easy - just type the following in your terminal:
yarn create next-app
cd $YOUR_PROJECT
yarn dev
... and the Next.js application was already running on Port 3000. That wasn't so hard, was it? Now, about the Registration-Form. Adding new URLs (like /register), is quite easy. Just create a file in pages/register.js:
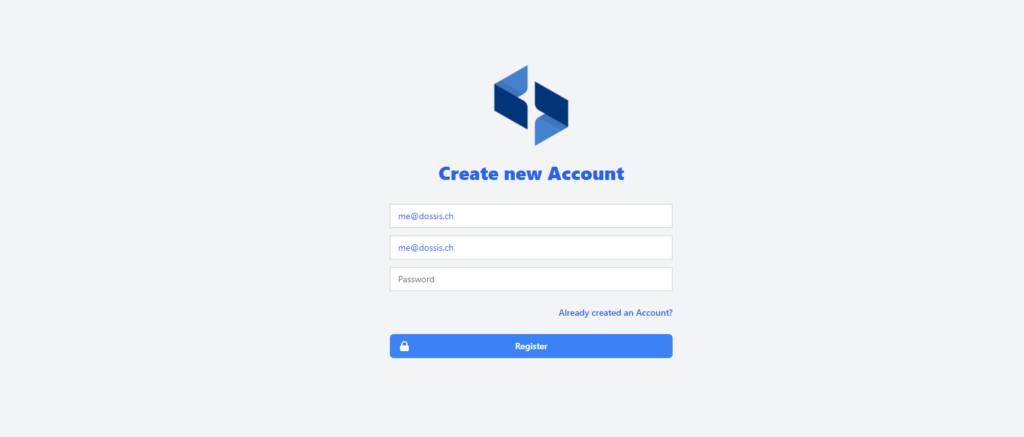
To have a beautiful UI, I gave tailwindcss a go - Installation with Next.js is also incredible easy (look here for a guide)
The HTML for the form look like this:
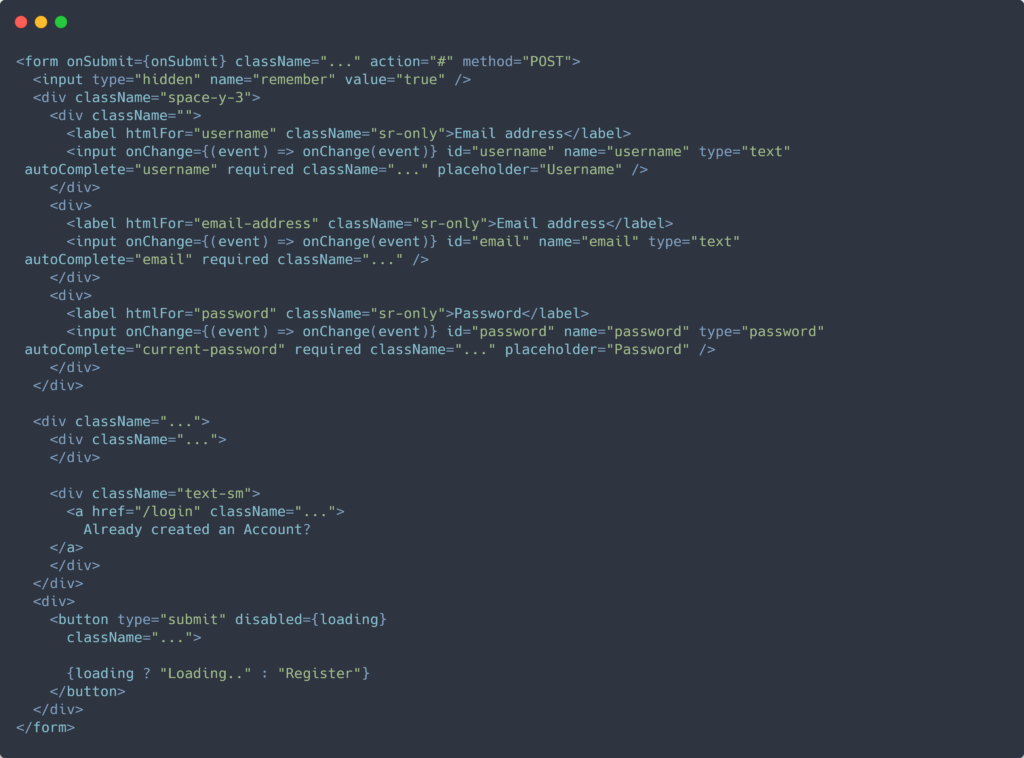
So, basically it's just a classic form (with a lot of css classes for the styling using tailwindcss, which have been remove for readability here), with a onChange-Listener for the input fields and and onSubmit-Listener.
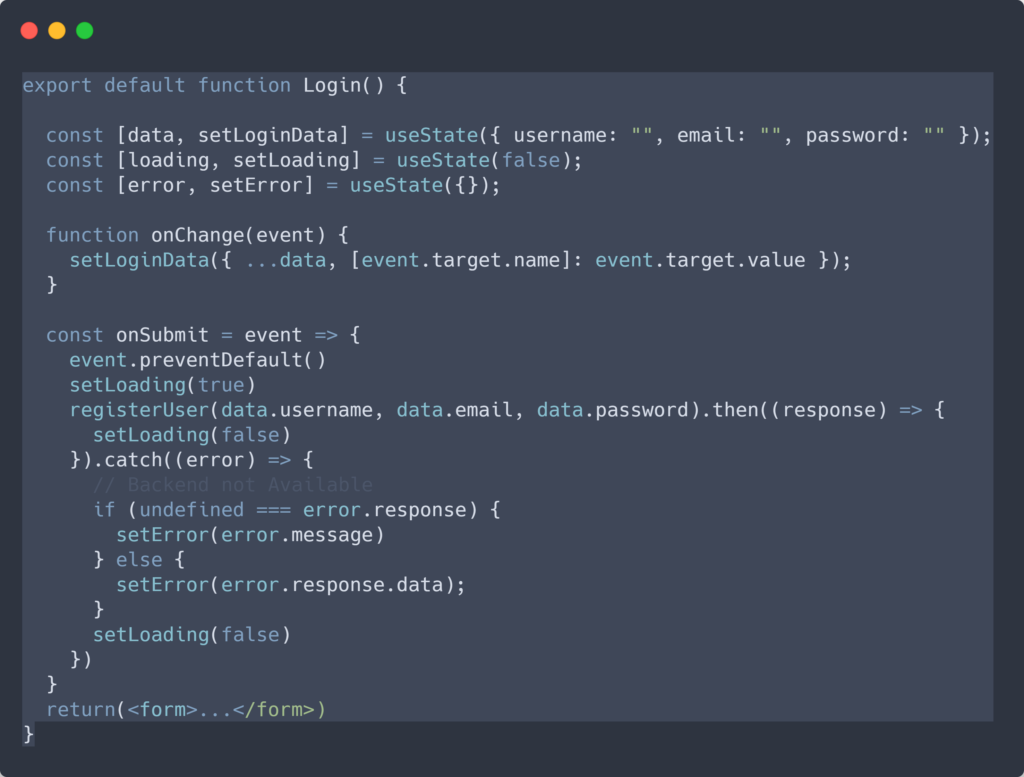
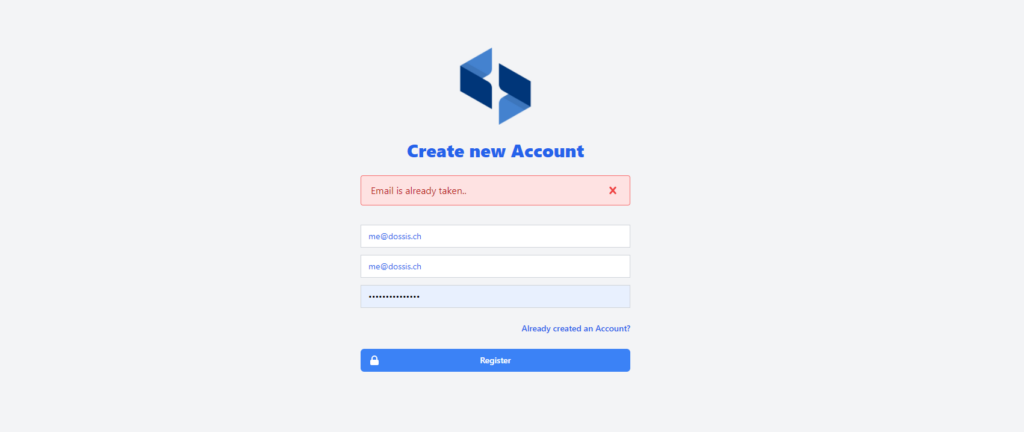
There's also a loading and error state, to be able to show the user when the request is loading or display the error. (Also I added a small, onClickListener to resolve the errors: onClick={() => {setError("")}}
The onChange-Listener adds the values from the form to the state, to pass them easily later on to the backend.
The onSubmit-Listener will send the data from the form to the backend. The event.preventDefault() statement, will disable the default behaviour of the form, as I will handle the call to the backend itself. Side-effect: the check for valid email will not be done anymore
Calling the Backend
To be able to register the user (or equally with the login later on), we need to send the data to the Strapi-API. We'll do that with an Promise:

On a successfull registration, we'll store the Strapi token in a cookie and resolve the Promise and redirect the User to a welcome page. On error, we return the error message to the frontend.
What are Promises? Promises are way to handle asynchrous code, they are like "a proxy that will eventually become available". So, a promise, when initialized has the status pending. In the future their state will turn into resolved (on success) or rejected (on a error).
To recap: You can pass a function to a promise and then define what should be done later on when the result is returned.
Now, we would have the whole communication ready between backend and frontend. Registration form would create a user on the backend. The next step to do, would to save the user information globally in our React application. Normally in React you'd pass data via props to components, but sometimes (like this one), you don't want to do that. The alternative wouldb be a React Context
React Context
Context is actually used to share global data, good examples for it (according to the documentation of reacts.org) are the authenticated user, the theme or a preferred language.
To add an context to your React application the following needs to be done:
Intialize the context
const MyContext = React.createContext(defaultValue);Wrap the component(s) around the content and define some default Values:
<MyContext.Provider value={/* some value */}>Now, the next steps would be to update the User after a succesfull login, change the navbar if the user is logged in and load the data from the cookie like described here
If you want to read more about any of the topics, here you go:
- You want to build an Food delivery app with Next.js, Strapi and even add payment with Stripe? here you go https://strapi.io/blog/nextjs-react-hooks-strapi-food-app-1
- Adding Cloudinary to Strapi https://strapi.io/blog/adding-cloudinary-support-to-your-strapi-application
- Adding Authentication in Strapi: https://strapi.io/blog/user-authentication-in-next-js-with-strapi
- Reading more about React Context: https://reactjs.org/docs/context.html